Dave Mathis shows us how to install some basic bolt-on performance modifications on this customer’s Harley Davidson V-Rod.
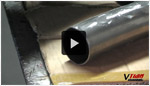
Once the bike is prepped and on the lift, with the old pipes and brackets removed – Dave will show us how to install the slip-on exhaust and check for correct fitment. Once the correct fitment has been established, tighten the clamp while making sure to avoid striping the threads. Power tools are optional, but will certainly speed up the process and make things easier for you!
After the clamp has been tightened, we move to the mounting bracket which uses OEM location – tightening these bolts to the included specs, make sure that everything lines up correctly and finish torquing the bolts.
With the exhaust installation completed, we can move our focus to correctly tuning the motorcycle’s fuel map to reflect the increased air flow allowed by the new exhaust system. We can do this by connecting a power commander tuning system to the bike’s power commander ECU and picking the closest map, or editing existing maps for further fine-tuning depending on how the bike ends up running out on the road.
After the tune has been uploaded and the “sent successfully” prompt appears, we can put everything back together and take it for a spin to see how everything works. 99% of the initial tunes work very well, but bikes with more extensive modifications can take more time to fine-tune for optimal performance.
Feel free to drop us a comment in the Tech Talk Forums if you have any questions on this episode!
Head tech Dave Mathis shows us how we perform most of our retrofit electrical system installs on customer bikes that are in need of electrical system overhauls.
Most custom motorcycles out there today put the majority of their focus into the shape, design, and paintwork of the bike. The functionality of the electrical system and the importance of its overall reliability is usually an afterthought – a design philosophy flaw that leaves a number of riders stranded on the side of the road.
An advantage of being a custom motorcycle manufacturer is that we have the ability of putting years of experience into constant revisions of our electrical system, which is now one of the most reliable in the industry.
All of the wires on the motorcycle are covered in self-extinguishing aircraft-grade conduit which protects wires from the many sharp edges in and around the frame and components of the motorcycle (and handlebars) which prevents a huge number of issues with shorts and ground problems. All of our components have been upgraded continuously to the point where we use exclusively race-automotive and marine application waterproof fuse blocks and relay systems, switches, contacts, and housings.
In this episode we’ll outline how a basic version of the system goes together.
Feel free to drop us a comment in the Tech Talk Forums if you have any questions on this episode!
In this video, we will go over the basics of removing the gas tank from our Harley in preparation for pulling the wires and eventually the handlebars from the motorcycle.
Access to the control wires for the handlebar switches is hidden from plain view and thus requires the removal of at least one side of the gas tank – usually both for the easiest access (and since they’re split, you’d have to drain the gas from both anyways).
If you follow the correct procedures in the right order, draining the tanks isn’t as messy as you’d think. The majority of fuel can be drained directly through the petcock, however a small amount of fuel will drain out of the feed line when you disconnect it – the remainder of fuel will be drained through the crossover lines on the tank, which allow the fuel to fill and drain evenly between the split tanks.
With the tanks off, we have now gained access to most of the electrical system on the bike – and more importantly, all of the connection points for the switches and buttons feeding from the handlebar controls. Check back often for more updates, including the remaining parts of this episode as well as other exciting projects in the future.
Feel free to drop us a comment in the Tech Talk Forums if you have any questions on this episode!
In this part, we will cover the various steps required to remove and reinstall the plugs which are attached to the handlebars.
Obviously the plugs won’t fit through the bars themselves, so we will need to cut the connectors off and install them again once we’ve run the wires through the new set of bars.
It’s important to document all of the cuts that you make (on BOTH sides) so that everything will go back together smoothly when we’re done. Be sure to use a permenant marker or pen, and don’t smear the notes (or you’ll really regret it when trying to figure out a certain wire among the pile of handlebar connections).
After removing or loosening all of the components attached to the various cables running to the handlebars, we’ll be able to take them off and start measuring for new brake lines, throttle cables, and a clutch cable.
Feel free to drop us a comment in the Tech Talk Forums if you have any questions on this episode!